


Kotlin: Switching between Activities and Intercepting the Back button
- Victor Balas

- Jul 2, 2020
- 4 min read
Updated: Jul 10, 2020
In this example we will see how to switch between Activities and also detect when the user clicks on the System Back button. The System Back button on Android is used to navigate in reverse chronological order through the screens the user has recently accessed. You can check out my YouTube video for this post at: https://youtu.be/8OgBwQrUCvY
Start a new Android studio project. Choose an Empty Activity. Rename the MainActivity to Activity1 - make sure you change the name in the corresponding Layout File (activity_main.xml), in the MainActivity.kt class as well as in the project manifest (AndroidManifest.xml)
Change the name of the Layout file from activity_main.xml to activity_1.xml. To change the file names you go to Refactor > Rename File.
Now to create a second Activity, right Click on your package, select New > Activity > Empty Activity.
Call the second Activity, Activity2 and click Finish.
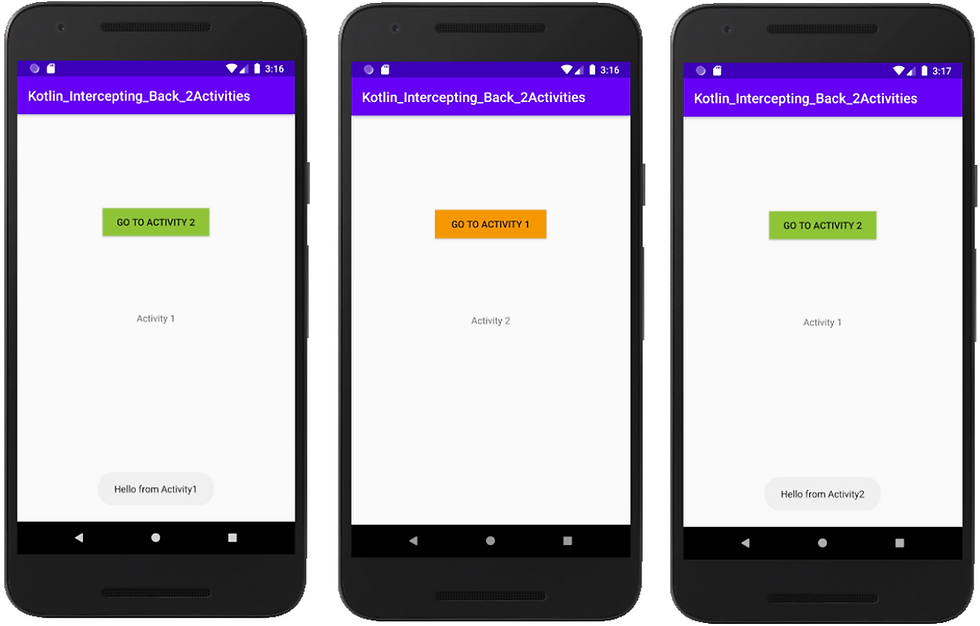
Create/change the Layout for the first Activity by changing to TextView Text to “Activity 1” and “Activity 2” for the second TextView Text.
You should also change the background colour for the two buttons just to make it more obvious when switching from one Activity to another.
You should now have two Activities (Activity1 and Activity2) with two layouts (activity_1.xml and activity_2.xml).
Let’s change the Text for our first activity from “Hello World!” to “Activity 1”
Let’s now add a Button to the first activity. Let’s change the Text for the Button to “Go To Activity 2”. Let’s change the ID for this Button to “button1”.
Let’s copy the two controls from Activity1, the Button and the TextView. Paste them into Activity2. Change the text for the Button to “Go to Activity 1” and the text for the TextView to “Activity 2”
Let’s keep the position of our two controls in each view by selecting them and clicking on the “Infer Constraints” button (the little "magic wand" icon at the top next to the "magnet”). This way we move each view into the position we desire instead of adding constraints to every component as we place them in the layout. I’m just being lazy here, as this is the easiest way to add constraints, but it can also be the worst. The control placement works correctly in this particular screen size, but it might not look like you want it to in a different screen size/orientation.
In the Attributes window, locate the onClick property for button1 and write onButton1Click method.
Now when the button is tapped, the system calls the onButton1Click() method. We need to implement this method in our first activity in order to start Activity2.
Let’s now add an “intent” to our Activity1 class. This intent will represent our Activity1’s intent to start Activity2. It basically represents runtime binding between separate components such as activities. Intents also allow us to transfer data between activities.
/** Called when the user taps the 'Go To Activity 2' button */
fun onButton1Click(view: View) {
 // open the second activity in response to button1 being pressed

 //Here we are using an explicit intent where we specify the component/activity to start by name.
 val intent = Intent(this, Activity2::class.java).apply {

 }
 startActivity(intent)

}
Let’s add a similar code for the button2 in the second activity in order to go back to our first activity.
/** Called when the user taps the 'Go To Activity 1' button */
fun onButton2Click(view: View) {
 // open the first activity in response to button2 being pressed

 //Here we are using an explicit intent where we specify the component/activity to start by name.
 val intent = Intent(this, Activity1::class.java).apply {

 }
 startActivity(intent)

}
Make sure that button2 in the activity_2.xml has the onClick attribute set to onButton2Click.
When we run our app we should now be able to move from Activity 1 to Activity 2 and back.
In order to move backward through the history of your Activities/Screens Android devices provide a Back button to achieve this functionality.
We can control the behaviour of the Back button by overwriting the onBackPressed() in the Activity. When using Fragments we'll need a different approach. I will discuss Fragments and detecting the Back button in a future post.
Let’s add a message when the user clicks on the Back button. We can use a “toast” for this. A toast provides simple feedback about an operation in a small popup. It only fills the amount of space required for the message. The current activity remains visible and interactive. Toasts automatically disappear after a specific timeout.
The Toast.LENGTH_SHORT and Toast.LENGTH_LONG are the constant that defines the time duration for message display. The applicationContest returns the instance of Context class.
//Display the name of our current Activity/class as it was declared in the source code
val text = "Hello from " + this.javaClass.simpleName
val duration = Toast.LENGTH_SHORT
val toast = Toast.makeText(applicationContext, text, duration)
toast.show()
Now, for intercepting the Back button click in the Activity. In order to achieve this you need to override the Activity's onBackPressed() method. Usually this method opens up the top activity in the stack.
For the Activity2 when back button is pressed we want to exit that activity and also we don’t want to add this to the activity stack - so we call the finish() method inside onBackPressed() method. It will not close the entire application. it will go for the previous activity in the stack which is Activity1.
 override fun onBackPressed() {

 //Display the name of our current Activity/class as it was declared in the source code
 val text = "Hello from " + this.javaClass.simpleName

 val duration = Toast.LENGTH_SHORT
 val toast = Toast.makeText(applicationContext, text, duration)
 toast.show()

  finish()
 }
Hope this helps. You can find the full code on Github.
Comments